How to Create and Sell Online Courses on Lnkk.it: The Complete Guide
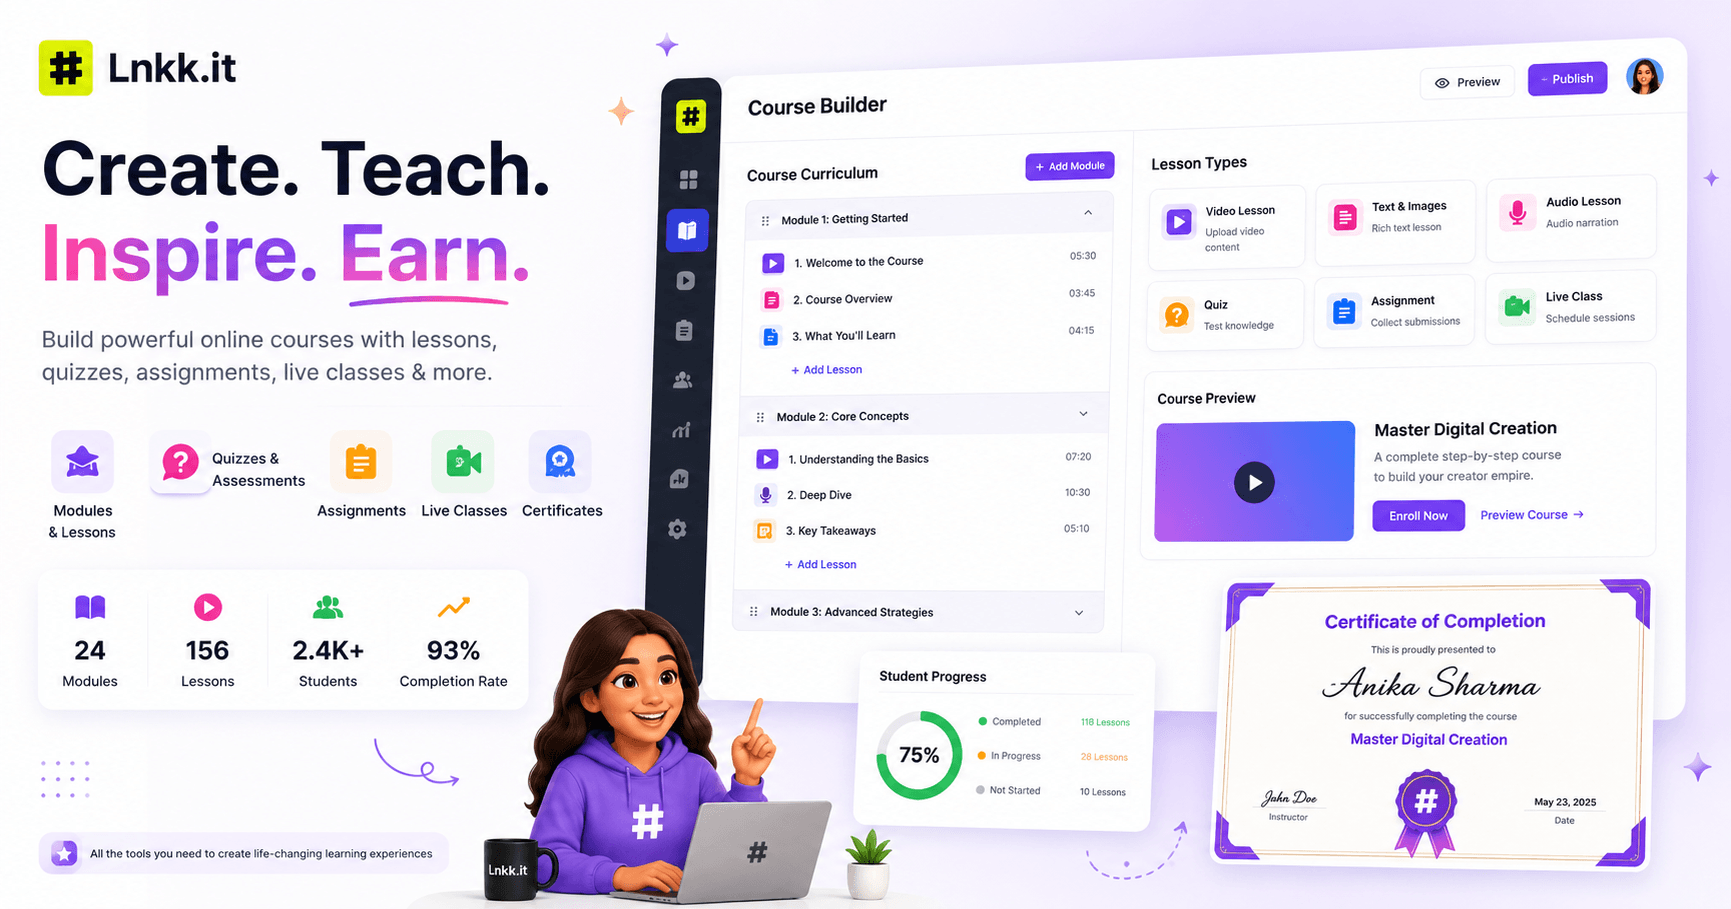
Turning what you know into a course used to mean picking a dedicated LMS platform, building your bio link elsewhere, and hoping the two connected well enough that a follower could actually get from "saw your post" to "enrolled in your course" without giving up halfway through.
Lnkk.it's Course product puts the whole path in one place — the curriculum builder, the checkout page, and the bio link a student found you through, all under one login. Here's exactly how it works.
Building the Curriculum: Modules, Then Lessons
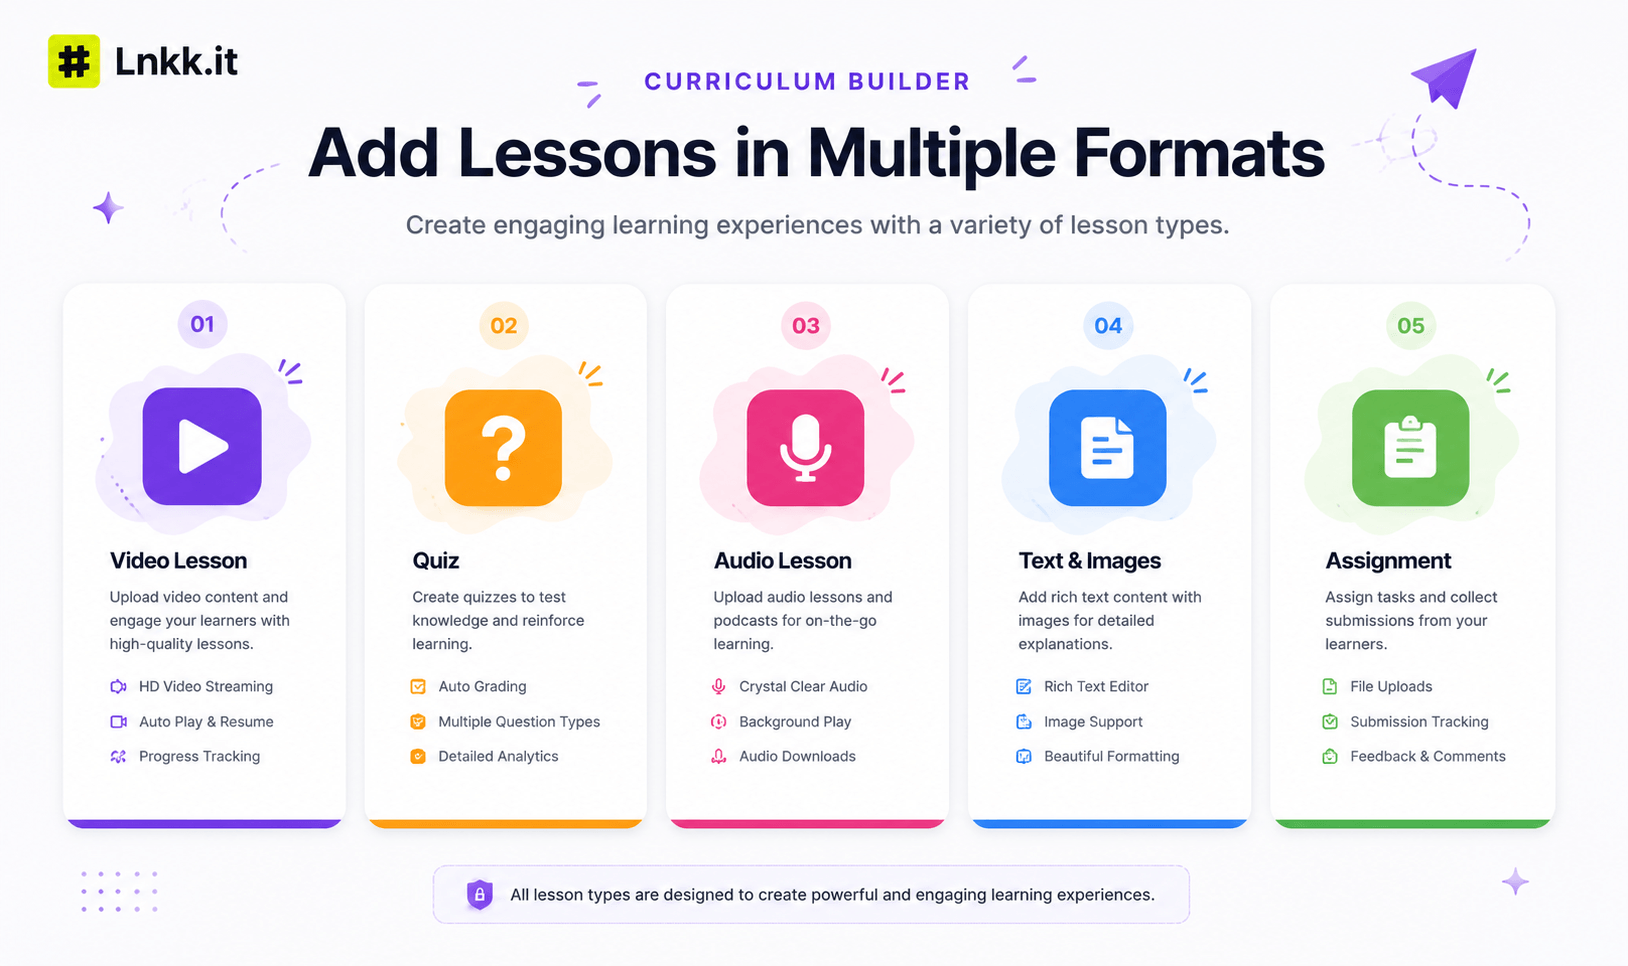
A course is structured as modules containing lessons — you add as many modules as the course needs, then drop lessons into each one. What makes this genuinely flexible is the lesson type selector:
Show Image
Video — the standard format for most course content, with attached video files and duration shown automatically
Quiz — a comprehension check between lessons
Audio — for course content that works better listened to than watched
Text — written lessons, guides, or reference material
Assignment — practical tasks students complete and submit
You can mix these freely within a single module — a video lesson followed by a quiz, then a text lesson, is a completely normal structure. You're not locked into an all-video or all-text format the way some simpler tools force you to be.
One detail worth knowing: editing your curriculum — adding modules, swapping lesson content — doesn't trigger any kind of review process. Only changes to the course title, price, or cover image do. That means you can keep refining and expanding a course after launch without it disappearing from sale while a review clears.
Course Settings That Actually Matter
Beyond the curriculum itself, a handful of settings shape how the course is positioned and sold:
Difficulty level (Beginner, Intermediate, Advanced) — shown directly on the course page so a prospective student knows what they're getting into before buying
Language — displayed as a clear badge, useful if you're selling to a specific regional audience
Access duration — choose Limited (a set number of days from purchase) or Unlimited, depending on whether you want a course to function like a time-boxed cohort or a permanent resource
Learning outcomes — a simple list ("What you'll learn") that adds directly to the public course page, giving visitors a scannable reason to buy before they read anything else
Certificates of Completion
Toggle on a certificate, and students who finish the course automatically qualify for one. For anyone selling a skills-based or professional course, this is a real credibility lever — a certificate is often the actual deliverable a student is paying for, not just the content itself. You can also choose a course page template (styles like a classic serif design with gold accents are available) so the public-facing page matches the tone of what you're teaching, whether that's a professional certification or a casual creative workshop.
What the Student Actually Sees at Checkout
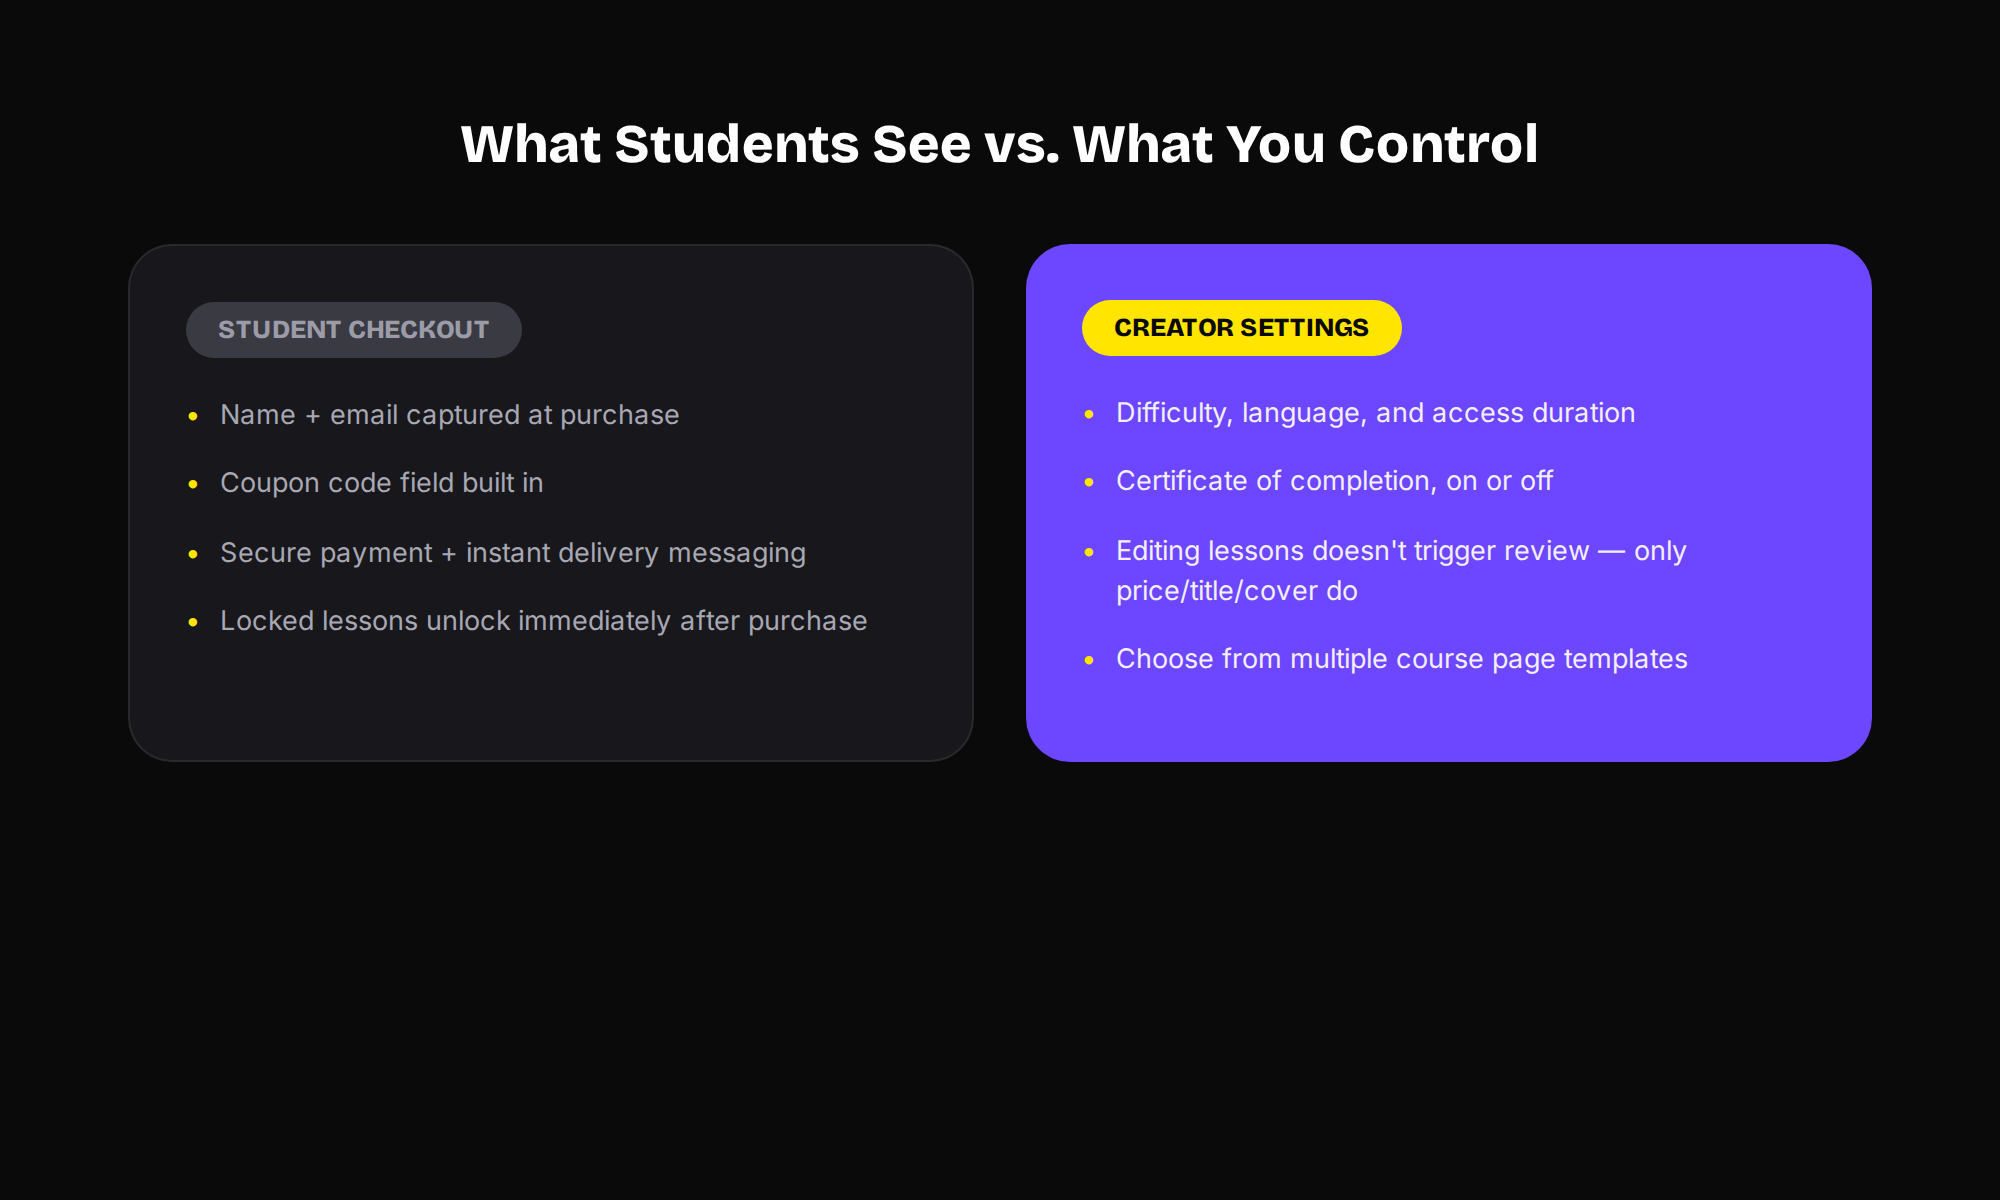
The purchase flow is deliberately simple: name, email, and an optional coupon code field, with secure payment and instant delivery messaging built into the page. The moment payment clears, previously locked lessons unlock immediately — no manual step on your end to grant access. If you're running a launch discount or an affiliate partnership, the coupon field means you don't need a separate discount-code tool bolted on.
Setting One Up, Step by Step
From your Creator Store dashboard, create a new product and select Course as the type
Fill in the title, short description, and a full description (rich text, images, and embeds are all supported)
Build your curriculum — add modules, then populate each with video, quiz, audio, text, or assignment lessons
Set difficulty, language, access duration, and your learning outcomes list
Decide whether to issue a certificate of completion, and pick a course page template
Set your price and publish — the course page goes live with its own shareable URL, ready to link from your bio page or promote directly
Who This Is Actually For
Course-selling makes the most sense for anyone whose expertise is genuinely structured — a skill with steps, not just a single tip. Coaches turning a signature framework into a repeatable curriculum, educators packaging a subject into modules, consultants productizing what they'd otherwise explain one client at a time. If what you're selling is closer to "here's one PDF," Lnkk.it's digital products format is a better fit — courses are worth the extra structure specifically when there's a real sequence to teach.
FAQ
Do I need a separate LMS if I sell courses through Lnkk.it? No — the curriculum builder, checkout, and student access are all handled inside Lnkk.it, alongside your bio page and any other store products.
Can I edit a course after it's already selling? Yes — curriculum changes (modules, lessons) don't trigger a review. Only changes to the title, price, or cover image do.
What happens if a student's access is time-limited and it expires? That depends on the access duration you set — Limited access ends after the number of days you specify from purchase, while Unlimited access has no expiration.
Can I offer discounts on a course? Yes — the checkout page includes a coupon code field, so you can run launch discounts or provide codes to affiliates and partners.
Ready to turn what you know into a course? Set one up inside your Creator Store — the curriculum builder, checkout, and student access are ready as soon as you publish.
Looking for something more one-on-one instead? See Coaching & Bookings, or browse more guides on the Lnkk.it blog.
YOU MAY ALSO LIKE
How to Sell Digital Products Directly From Your Instagram Bio Link (No Website Needed)
Sell 1:1 Coaching & Bookings Directly from Your Bio Link — No Calendly, No Zoom, No Code
Accept paid coaching sessions, strategy calls, and 1:1 mentoring right from your Instagram bio link. Google Calendar sync, auto-generated Meet links, instant payments — all built in. Here's how Lnkk.it replaces Calendly + Zoom + Stripe in one click.